|
Area51 Project - From Basket Case to Beauty:
Machine Specs:
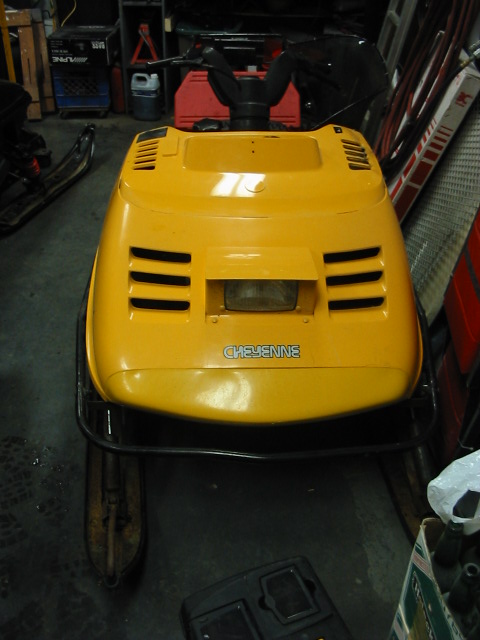
1992 Bombardier Cheyenne 503 Rotax 503cc Fan Cooled Front: Leaf Springs Rear: Lord only knows, articulating rail though 136"x15"x0.88" Track Stock Gearing, Mechanical Reverse Custom Paint & Body Work Custom Storage Box
Project Complete!
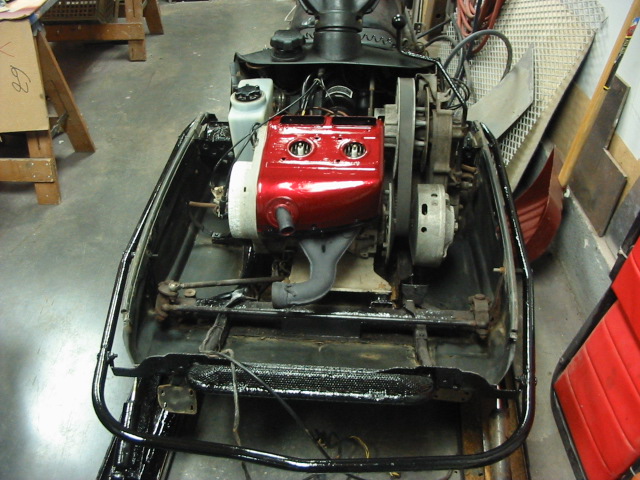
Have you ever wondered what the heck your going to do with that beat up hood on your old sled? You could replace it, but what person driving a sled from 1992 has the desire and budget for that? The other option is to fix it, and this is the story of how we made Dad's recently purchased, mechanically sound, low mileage 1992 Ski-Doo Cheyenne look as good as it ran. This particular sled had been dealer maintained by the previous owner in all areas except appearance. Years of riding and the odd run in with a tree (that kind that pop up in the middle of the trail) had taken its toll on the tired, tattered, factory finish.
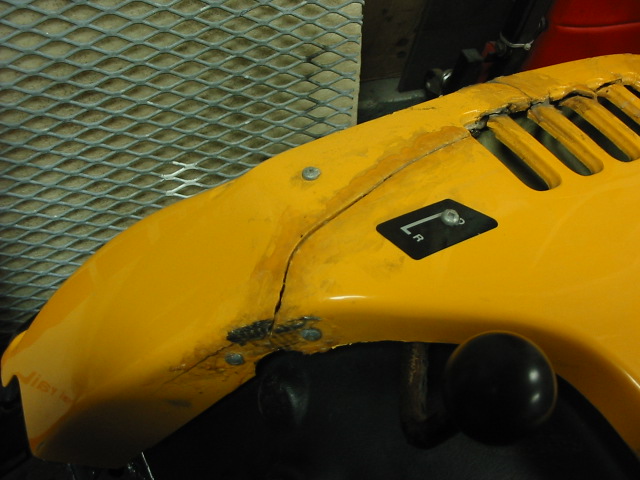
The first step (once we wrestled the hood off the machine), was to strengthen the hood, because it had so many cracks it resembled more of a wet noodle then a nice solid hood.
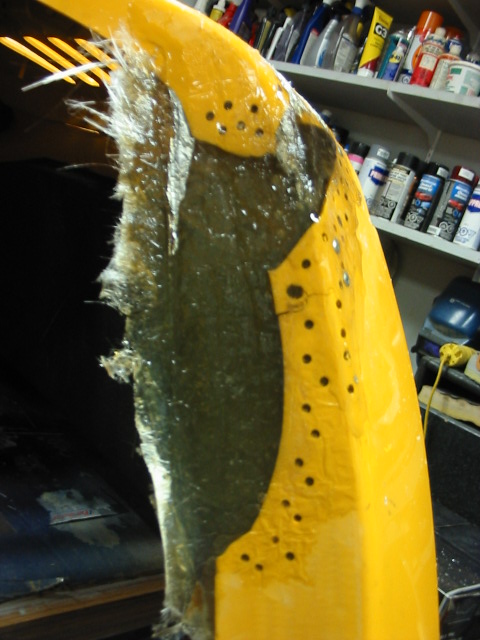
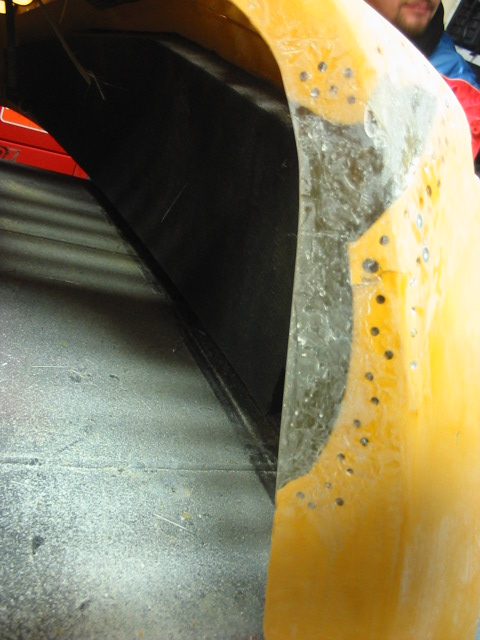
The previous owner had bolted and riveted various scraps of metal and garbage to the hood trying to strengthen it, so the first step was to remove the previous repairs so we could start fresh. The hood of this particular sled was made from plastic, so normally you would have the cracks plastic welded and pieces welded in place to replace the gobs of missing hood now scattered around the Newfoundland wilderness. Since we are backyard mechanics and these tools not available to us, we improvised and used what materials we had. We started by fabricating sheet metal strips to span the larger cracks and gaping holes. These were fastened with pop rivets countersunk on top and hammered flat on the underside. Once this was done the hood now had a little more structure and could just manage to hold its own shape.
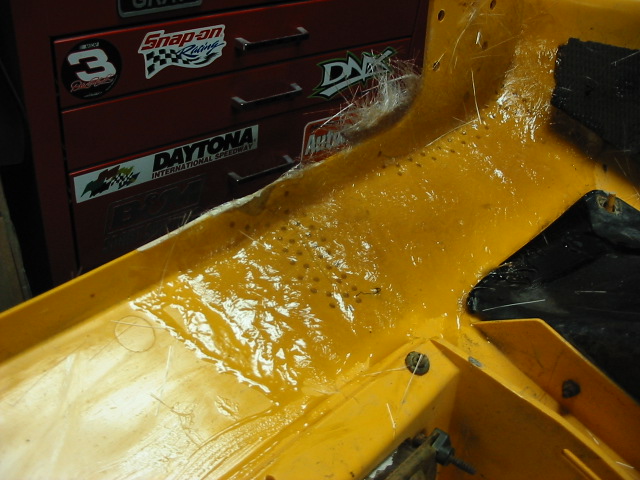
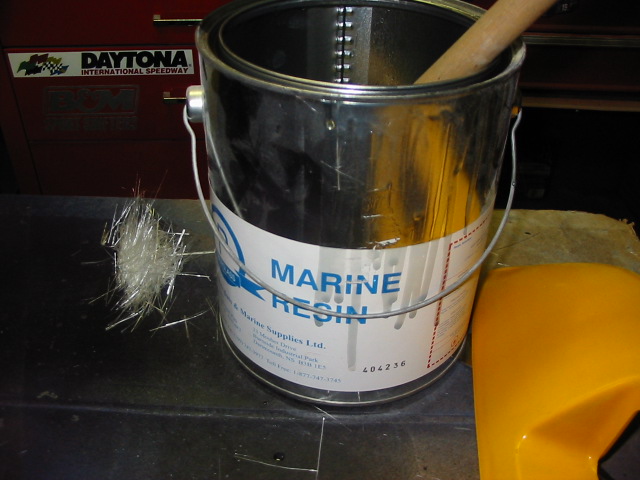
Next, many, many 9/64" holes were drilled into the plastic surrounding the areas we were repairing to a distance of about 3/4" from the edge of the cracks and holes. We did this because the fibreglass resin does not chemically bond with this particular plastic (which we tested prior to starting this stage), the holes capture the resin and lock it into place once it hardens. Chopped mat was cut with surgical precision to fit where plastic was missing using 3 layers to match the thickness of the plastic. One additional layer spanned the entire affected area from the underside to add strength and durability to the repair. For more tips on fibreglass repair, please visit the Tips & How To’s page on this site.
When working with fibreglass & resin, ventilation is important even in the cold winter months. Being gassed by these fumes isn’t as fun as it sounds! All of the chopped matt was soaked in resin layer by layer, they were nestled in place and the air bubbles worked out with an old stiff paint brush.
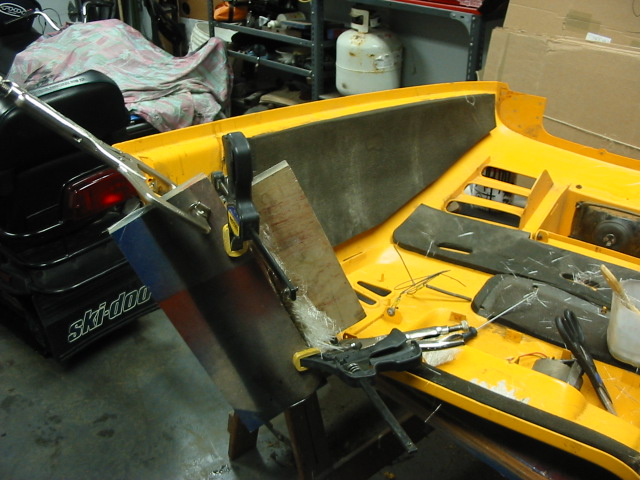
Pieces of MDF board covered in tinfoil were clamped to the top and underside of the areas where plastic was missing to act as a mould for the stinky concoction inside. The moulds spanned the affected area so the hardened fibreglass / resin mix came out to the exact same thickness as the surrounding plastic.
Once the moulds were removed and the resin fully cured, the section was trimmed with a rotary tool, then smoothed with a fine cut file and finished with a sander.
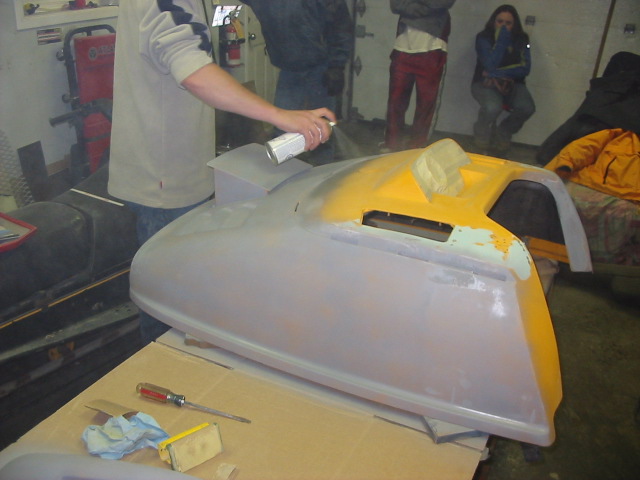
The next step was to smooth all repaired areas with body filler. I used the green spot coat because it adheres well to fiberglass and plastic, and is not so prone to air bubble deformations. I spent many evenings adding filler, and taking it down with coarse files & long board sanding blocks. After sanding, shiny areas showed the low spots where filler needed to be added, repeating as many times necessary to get an even coat of filler on the affected areas with no imperfections. The goal is to have a nice level finished repair, blended well to the rest of the hood so that the repaired area does not stand out like a sore thumb after paint. If your unsure how even the finished surface will be, a mist of flat dark paint as a guide coat will help as you sand with your long board. Body work is pretty straight forward, but the quality of the finished product depends solely on these steps and time you spend to get it looking right. The next step was paint. There are many ways to go about this, you could send it out to a body shop, use proper automotive paint and a proper paint gun, or the ever popular spray can. I used what I was comfortable with, and used spray cans! Sounds tacky I know, but there’s still a right way to do it with products from the automotive paint aisle. Probably the easiest but wrong way would be to drown the project in a one step enamel rust paint and call it done. The better way is to use a multi step process, primer, colour coat, and protective clear coat. This way you have many more color choices such as matching your favourite color car, and the result will be more durable with a clear coat. Important things to remember is to stay with one manufacturers product line, using the part numbers they recommend in the directions to ensure that primer bonds to the colour coat, which then bonds well to the clear coat. Unmatched products will easily chip and peal. Don’t forget that note from earlier about ventilation!
First I applied a coat of plastic primer to ensure a good adherence of the paint to plastic. Always do a test spot first and let it dry to be sure there’s no chemical reaction between this first layer of paint and the plastic.
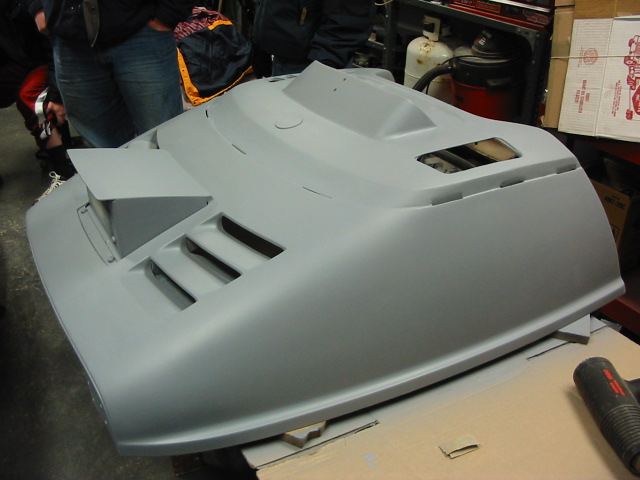
Next I used etching Grey primer, applying 3-4 coats as needed to get a finish with even color all over and no runs. This is important with metallic color paints, they are translucent and will reveal the shadows in the primer coat. Between each coat I lightly sanded the hood to remove imperfections from dust.
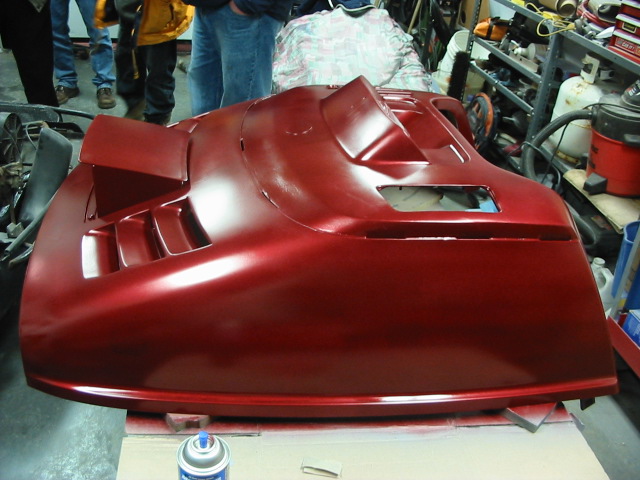
Next came the color coat, which I used an automotive color match paint in the same product line as the primer paint. It was applied in 5 light coats to achieve the desired shade, .the more coats added will make the color darker. Again I lightly sanded between each coat to remove any settled dust and imperfections. The final step was the clear coat. This was applied in 3 slightly heavier coats then used for the primer and color coats so that the product would settle and level out as it dried. This helps to prevent a satin finish and an orange peel effect. This takes a little practice as there’s a fine line between heavy enough, and getting runs in the paint.
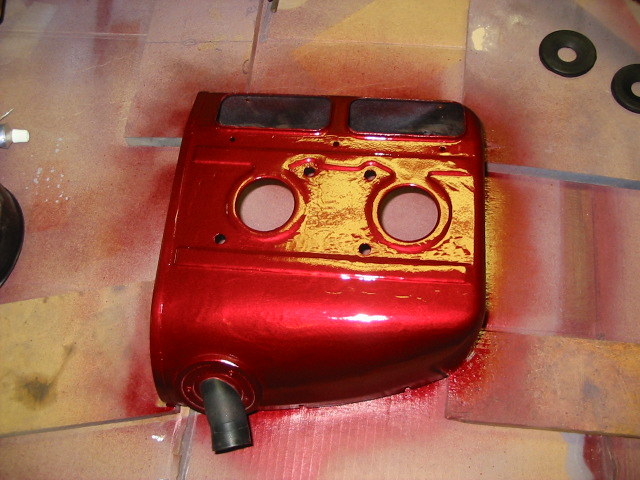
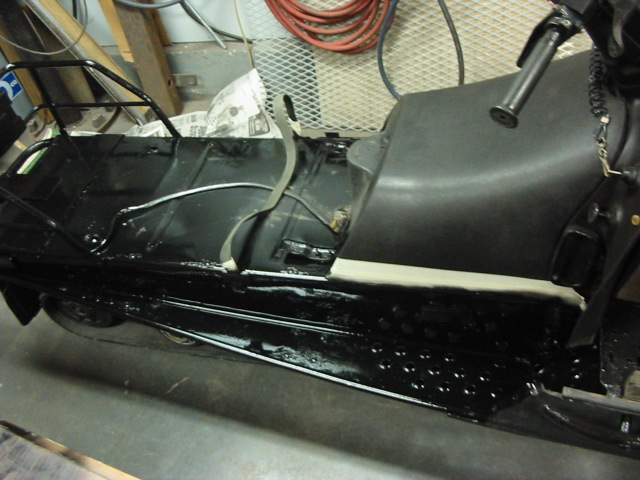
In between coats of paint, we took the time and cleaned the engine compartment and tunnel of sled, applying a fresh coat of Gloss Black enamel paint to make the entire sled look like new. WE also colour matched the top engine cover to match the hood.
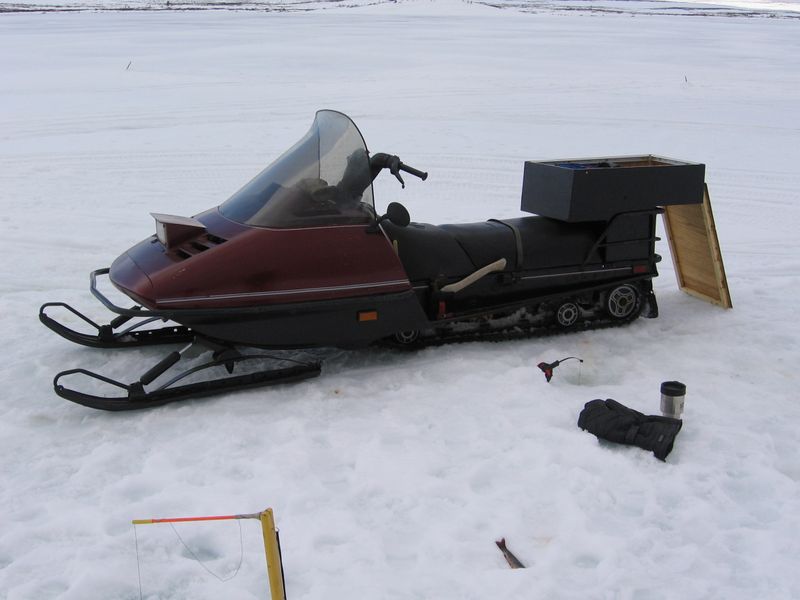
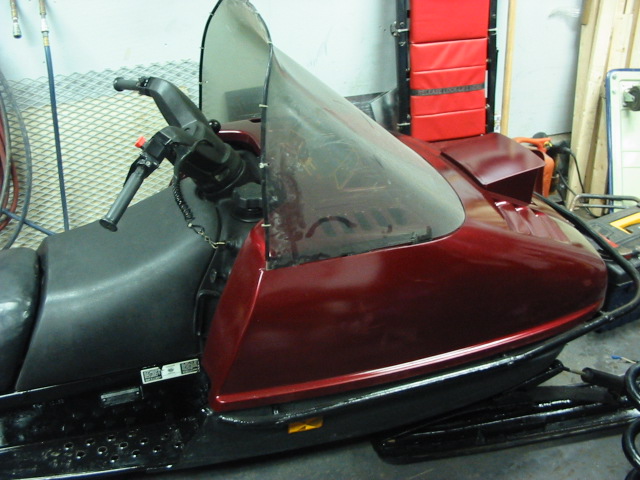
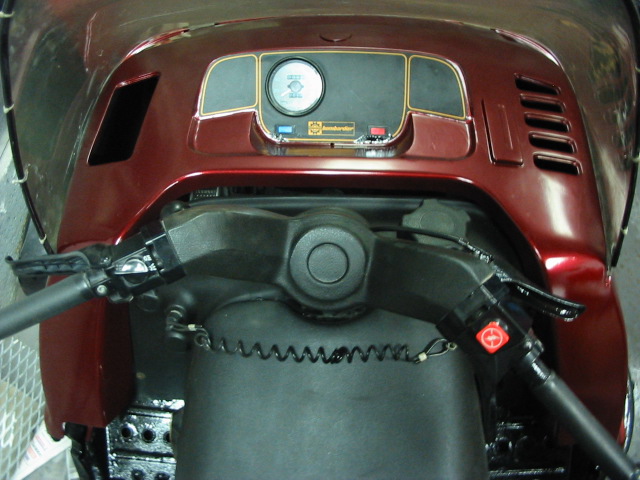
Finished Product. We sat back, relaxed with a beverage and marvelled at the wonder before our eyes. The hood turned out great, shown here with the crappy old windshield.
Dad was so impressed with the result that he went out and splurged on a brand new windshield. The paintjob was finished with a simple pin stripe and a custom box built by dad for hauling ice fishing gear and a lunch.
Cheers, MIKE
Copyright © 2025 Michael Smith
|